How Do I Access My Admin Portal?
From the club admin portal, the following club membership management tools are accessible:
Member database•Basic member search
•Lapsed member search
•Pending approval process for Retirees
•Full member search and export with membership level information
Profile update requests to refresh information•Individual member profile update request
•Request group profile updates
•Profile update email history
When you log on to your member portal, you will easily be able to switch to your club admin portal. After you log on to your personal account, you will be taken to your member portal.
1. Click Go to My Group Portal at the very top of the pageThe group portal or leader portal is where club admins have access to administrative club features

2. You will be taken to a list of the groups you are in. Your role in each group will be listed on theright side of the screen
3. Click on the group you wish to view
4. Click on Go to Leader Portal
3. Click on the group you wish to view
4. Click on Go to Leader Portal
Member database review
Living at the core of your memberplanet club is your member database. Because your club is member based, think of it as the headquarters of the member management software. Variable data is stored and available to access for all initiatives, and conversely, whenever any action is taken on the platform, it feeds back to the database. This two-way relationship allows you to use tools based on data collected through the platform. For example, you can send email communication to a specific paid member level.
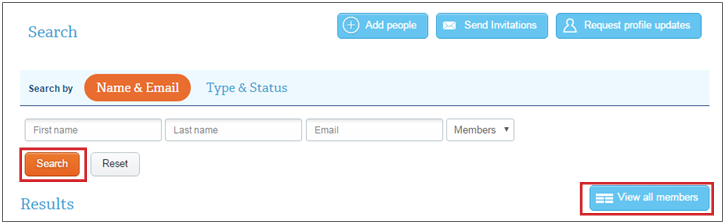
Basic member search:
As a club administrator, you can search group members through the member database.
1. Select Members on the left navigation sidebar
2. Type in the Name/Email of the member you wish to search.
3. Click Search
Note: You can also view all members by clicking the View All Members button
Living at the core of your memberplanet club is your member database. Because your club is member based, think of it as the headquarters of the member management software. Variable data is stored and available to access for all initiatives, and conversely, whenever any action is taken on the platform, it feeds back to the database. This two-way relationship allows you to use tools based on data collected through the platform. For example, you can send email communication to a specific paid member level.
Basic member search:
As a club administrator, you can search group members through the member database.
1. Select Members on the left navigation sidebar
2. Type in the Name/Email of the member you wish to search.
3. Click Search
Note: You can also view all members by clicking the View All Members button
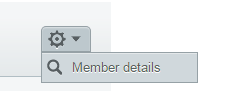
4. To view a member, click on his or her name, or click the gear icon and select Member Details
Lapsed member search:
Lapsed members are club members who are not up to date with dues payments. To view lapsed members:
Any lapsed members will appear along with their past due range.
Pending approval process for users who create a new account:
Club members who need to manually create accounts will need to be manually approved by a club admin.
Important note: Club admins should check with headquarters to ensure no duplicate records exist for pending members. You may contact [email protected] for assistance.
Learn more about customizing the new member join process.
Club admins can view and approve members who are pending approval, such as Retirees, from the member database:
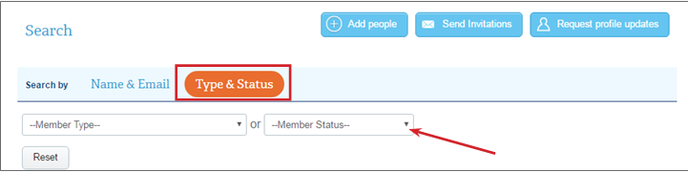
1. Select Members on the left navigation sidebar
2. Click Type & Status on the search bar
Note: From here you will have a number of search options via the dropdown menus.
3. Click on the dropdown menu for Member Status and select Requesting to Join
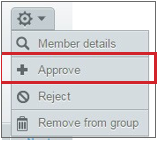
4. To approve a person requesting to join, click the gear icon next to user’s name, then select Approve
Lapsed members are club members who are not up to date with dues payments. To view lapsed members:
- Select Members on the left navigation sidebar
- Click Type & Status on the search bar
- Click on the dropdown menu for Member Status and select Lapsed
Any lapsed members will appear along with their past due range.
Pending approval process for users who create a new account:
Club members who need to manually create accounts will need to be manually approved by a club admin.
Important note: Club admins should check with headquarters to ensure no duplicate records exist for pending members. You may contact [email protected] for assistance.
Learn more about customizing the new member join process.
Club admins can view and approve members who are pending approval, such as Retirees, from the member database:
1. Select Members on the left navigation sidebar
2. Click Type & Status on the search bar
Note: From here you will have a number of search options via the dropdown menus.
3. Click on the dropdown menu for Member Status and select Requesting to Join
4. To approve a person requesting to join, click the gear icon next to user’s name, then select Approve
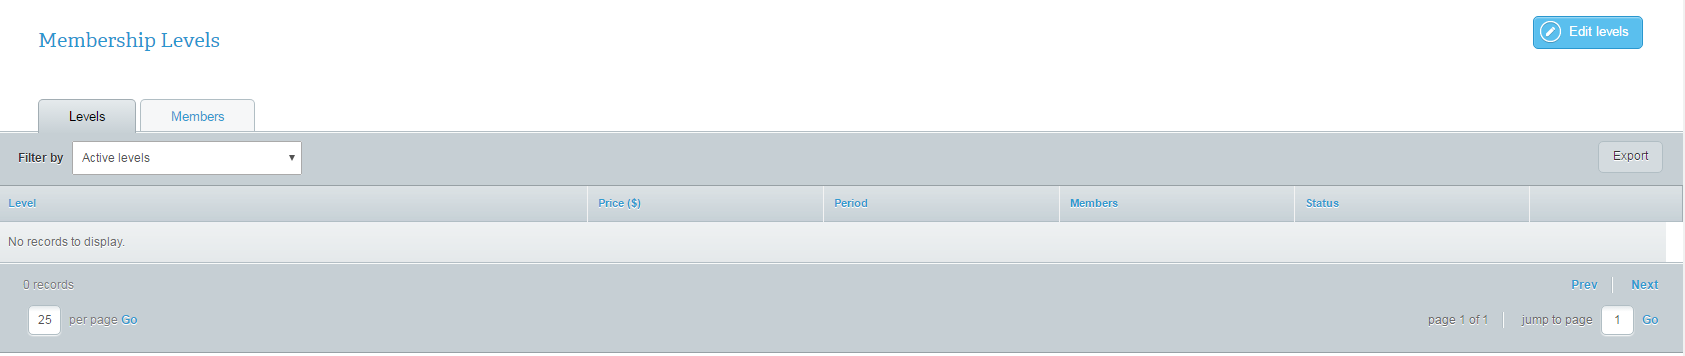
Full member search and export
As an admin, you can export your database, including membership level information, into an Excel file to have an editable view of your members. You may wish to have an expanded view of your club database for further processing, printing, or modification.
1. On the left navigation sidebar, click MembersThis shows a quick, searchable view of your member database. Viewing options here include: members/contacts, member type and status (invite status + lapsed). These options allow you to easily target your actions to a specific member category.
2. Click View All Members on the right side of the page This displays an exhaustive view of your members.•To sort members by status, including lapsed, click on the Member Status dropdown menu and select Lapsed.

Export to Excel
For more advanced sorting and filtering options, including pivot tables as well as a more expanded view, we recommend you export your database to Excel.
•You have the option to Choose Columns for an export. (This arrangement will not automatically be saved.)
•Admins can also filter the database based on any of the headings by alphanumeric, ascending, or descending order via the dropdown menu.
•Click the Export button to download an Excel spreadsheet of the database.
Profile update requests to refresh information
A member profile stores essential member information. Club members can occasionally change their personal information, such as address, phone number, and name. This can be a hassle when trying to maintain an accurate database. We recommend periodically requesting profile updates from your club members throughout the year. The Request Profile Update feature allows club admins to request up-to-date information from members via email, sending them directly to their individual record page where they can edit their information fields. They won’t even need to log in, and the data will automatically populate to their member profiles in the database without any additional administrative management.
Generic fields like “phone,” “email,” and “address” will automatically be included, but you can also add additional custom fields to gather information your club may need, such as dietary restrictions, emergency contact, and the like. Learn more about adding required and custom fields.
As an admin, not only can you request member updates, you can also edit them yourself.
To request a member profile update from one individual:
1. On the left navigation sidebar, select Members
2. Type in the Name or Email of the member you wish to search
3. Click Search
4. Click on his or her name, or click the gear icon and select Member Details
5. Select Request Profile Update (located under his or her photo)
To request member profile updates from all club members:
1. On the left navigation sidebar, hover over Members
2. Click Request Member Profile Update
3. Customize any text in the subject or info sections
4. Click the Choose Your Recipients button
5. Select recipients or click Choose a List to use an existing distribution list
6. Click the Send Email button
Profile update email history
To view who has gotten your request, opened it, or has completed the request, follow these steps:
1. On the left navigation sidebar, hover over Members
2. In the submenu, click on Profile Update Email History
From here, you will be able to see a general number of how many were sent, opened, and updated.
3. To view full tracking, click on the gear icon and select View Tracking Data from the dropdown menu
This will open an expanded view of each individual’s profile update tracking.
4. To export the data to an Excel spreadsheet, click the Export button on the right side of the page