Customize the New Member Join Process
To give new members the best experience in joining your group, we consider it a best practice to customize the join process. That means using your club’s banner in the set-up account screen and including a message that emphasizes the value of joining.
Note: The Connect Now account verification process will give your current members a separate, customized start in the join experience. Please see the Connect Now process documentation to see what current members will view upon verifying their accounts.
1. In the left navigation sidebar, click Membership
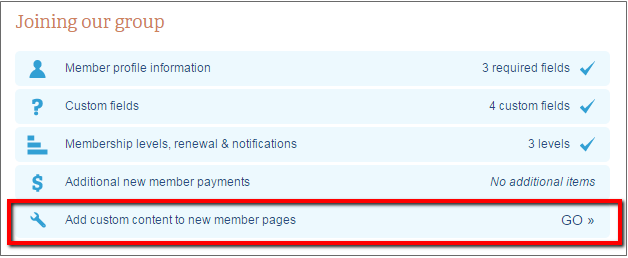
2. In the Joining Our Group section, select Add Custom Content to New Member Pages
1. In the left navigation sidebar, click Membership
2. In the Joining Our Group section, select Add Custom Content to New Member Pages
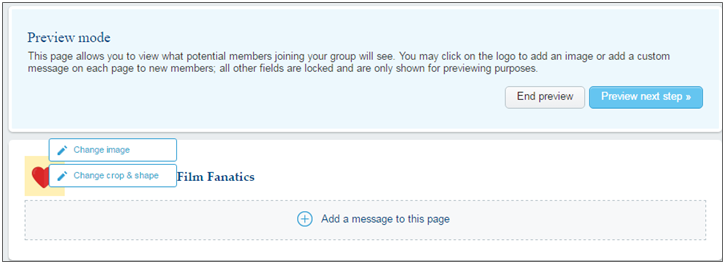
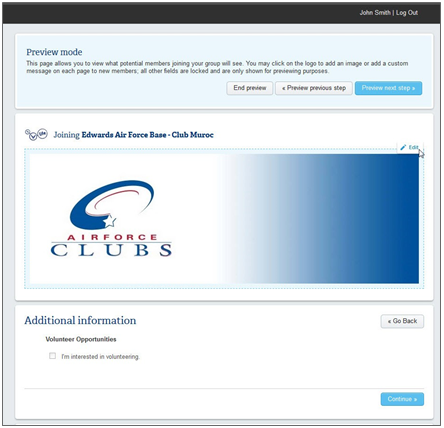
In this preview mode that displays what new members will see, club admins can click to change the
banner and add custom messaging.
Note: Image must be 900 x 300 px to fit properly. If you don’t have edit image software: Perform a browser search for “Image editor.” Any of the numerous, free results will guide you through editing your image to the correct pixel size.
banner and add custom messaging.
Note: Image must be 900 x 300 px to fit properly. If you don’t have edit image software: Perform a browser search for “Image editor.” Any of the numerous, free results will guide you through editing your image to the correct pixel size.
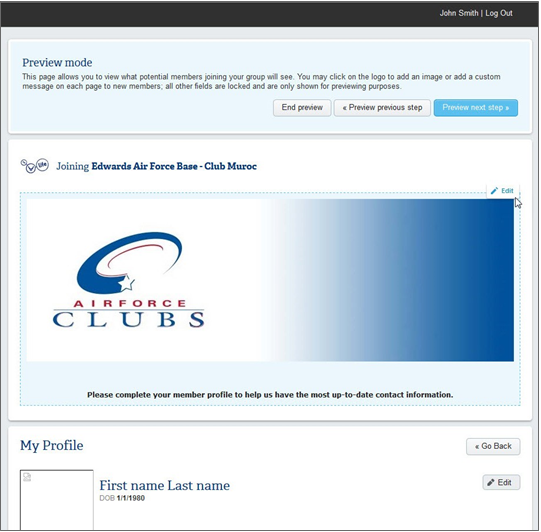
In the Connect Now account verification process for current members, the banner will be displayed on custom screens.
Member account creation
Page 1
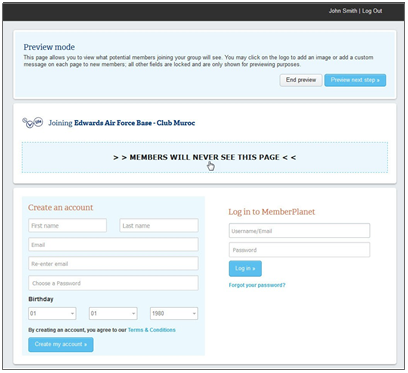
Users will be prompted to manually create an account if they are not already a member of a club.
Page 1
Users will be prompted to manually create an account if they are not already a member of a club.
Page 2: required profile fields page
Users must fill out required profile fields before being able to join. By default, name and email address are set as required fields for member data to be associated with the creation of an account. Learn how to set required profile fields.
Users must fill out required profile fields before being able to join. By default, name and email address are set as required fields for member data to be associated with the creation of an account. Learn how to set required profile fields.
Page 3: custom profile fields
After filling out required profile fields, users will be prompted to fill out custom profile fields. Club admins can add any number of custom fields, allowing your club to collect as much detailed info as needed.
After filling out required profile fields, users will be prompted to fill out custom profile fields. Club admins can add any number of custom fields, allowing your club to collect as much detailed info as needed.
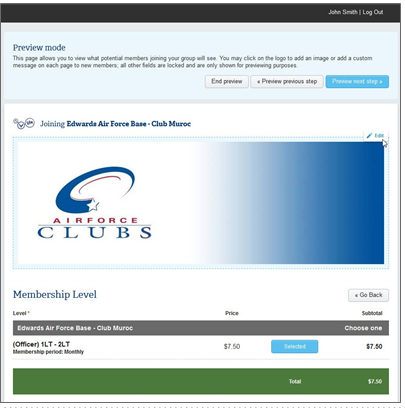
Page 4: member level selection and checkout
By default, member levels for existing members will be auto-assigned. New members will be able to choose their member level.
By default, member levels for existing members will be auto-assigned. New members will be able to choose their member level.
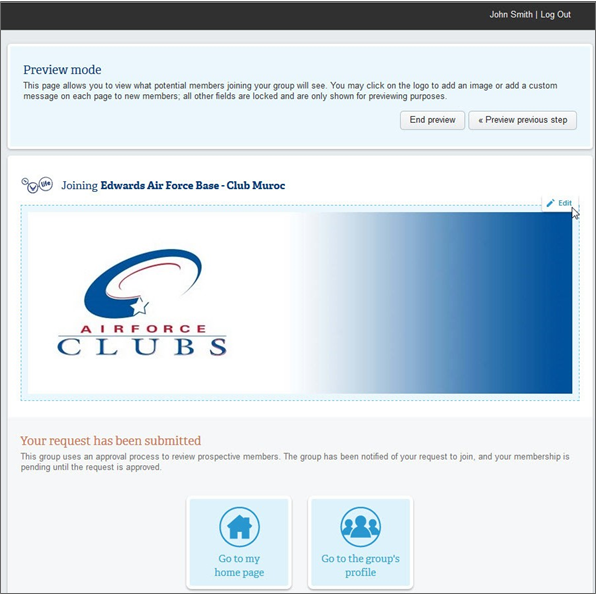
Page 5: confirmation page
Existing club members will be automatically approved. New members are the only ones who need manual approval by a club admin. Learn more about the pending approval process in Administrator Tools and Resources.
Existing club members will be automatically approved. New members are the only ones who need manual approval by a club admin. Learn more about the pending approval process in Administrator Tools and Resources.
