Email Overview
The platform’s email builder offers much more than just write and send. Our email functionality allows admins to build and send an HTML-rich newsletter with full integration for formatted text, images, custom hyperlink buttons, and background colors. Emails can be saved as templates for easy reuse.
How do I create an email?
Fill out the required basic information fields, click Next.
Campaign Name refers to the title by which you’ll refer to this email in your records. It only shows up in your Manage Emails tab under this name, which is not visible to members. Sender address will auto- populate if you’ve previously entered this information in the member info tab.
Note: The address entered on this section will automatically appear in the lower left corner of your email.
STEP 2: Recipients
Admins can choose to send emails to all members and/or contacts. Moreover, you can send to specific group members, add new recipients manually, or from a previously-created contact list, all with only a few clicks. There are five ways to add recipients:
- On the left navigation sidebar, hover over Emails, then on the submenu, click on Send an Email
Fill out the required basic information fields, click Next.
Campaign Name refers to the title by which you’ll refer to this email in your records. It only shows up in your Manage Emails tab under this name, which is not visible to members. Sender address will auto- populate if you’ve previously entered this information in the member info tab.
Note: The address entered on this section will automatically appear in the lower left corner of your email.
STEP 2: Recipients
Admins can choose to send emails to all members and/or contacts. Moreover, you can send to specific group members, add new recipients manually, or from a previously-created contact list, all with only a few clicks. There are five ways to add recipients:
- All Members: Select to send to all your members, contacts, or both in one click.
- Choose People: select individual members from your group.
- Choose a List: Select a distribution list you’ve previously created. Please see the Distribution List
- Use a Smart List: Select a distribution list populated by automated, system-generated queries based on member actions and statuses. For example, Smart Lists can be created based on a group’s member levels, or those who’ve RSVP’d to an event. (For more information about Smart List creation, see Communication Overview.)
- Add New People: Enter new people not otherwise associated with your group. They can be added individually, or uploaded from a separate email list.

|
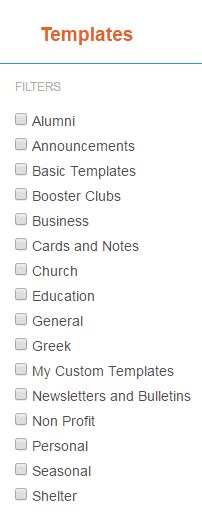
STEP 3: Template
Templates will help you create an attractive email that is fully customizable with HTML content, buttons, and personalized elements. The template options are:
|
|
STEP 4: Content
You can customize your content within the confines of your chosen email template.
You can customize your content within the confines of your chosen email template.
- Click inside the template window to bring up the Editor Tool
- Use the editor to add your content

There are also six pre-programmed buttons that allow you to insert information from other sections of your group:
Images: upload image from your PC
Personalized Text: From the dropdown menu, select how you’d like to address your recipients. All information, such as name and email address, is pulled from membership data. This allows each recipient’s email to appear directed specifically to them without sending one to each person.
Buttons: These are one-click elements for recipients to reach your payment forms, surveys, and the join-the-group process.
Note: Only one button can be added per email.
Documents: If you’ve linked your group to a Box account, you can attach documents as files using this feature.
Form Data: Personalize your email campaign by using the recipient’s answers to a question from one of your forms. (See Surveys and Payment Forms for more details on this).
Codes: Some multi-tiered organizations have the Email Series functionality included in their subscription.
STEP 5: Review
Once completed, review your email to ensure all the elements, such as recipients and links to social sites were successfully added.
Click the Save This Email as a Template button if you’d like to reuse it. All you’ll have to do is update content specifics, but the design and general elements remain.
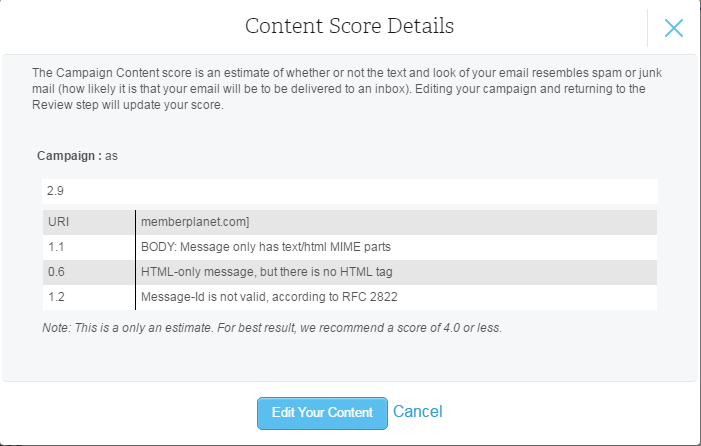
Campaign Score: Use this tool to estimate whether or not the text and look of your email resembles spam or junk mail. We recommend a score of 4.0 or less to minimize the likelihood your email isn’t delivered properly.
Images: upload image from your PC
Personalized Text: From the dropdown menu, select how you’d like to address your recipients. All information, such as name and email address, is pulled from membership data. This allows each recipient’s email to appear directed specifically to them without sending one to each person.
Buttons: These are one-click elements for recipients to reach your payment forms, surveys, and the join-the-group process.
Note: Only one button can be added per email.
Documents: If you’ve linked your group to a Box account, you can attach documents as files using this feature.
Form Data: Personalize your email campaign by using the recipient’s answers to a question from one of your forms. (See Surveys and Payment Forms for more details on this).
Codes: Some multi-tiered organizations have the Email Series functionality included in their subscription.
- Click on Add Follow Us Links at the bottom of the email window to add social media links that allow members to easily follow your group on your preferred platforms
- Click on Add Social Media Links at the top of the email window to allow this email to be shared by members on the selected platform
- Select Add Banner Image to include a specific image for your email. For example, the image you use for your group page
- Preview your email creation progress by selecting either the View as Web Page or Send Me a Test Copy function
STEP 5: Review
Once completed, review your email to ensure all the elements, such as recipients and links to social sites were successfully added.
Click the Save This Email as a Template button if you’d like to reuse it. All you’ll have to do is update content specifics, but the design and general elements remain.
Campaign Score: Use this tool to estimate whether or not the text and look of your email resembles spam or junk mail. We recommend a score of 4.0 or less to minimize the likelihood your email isn’t delivered properly.
STEP 6: Delivery
- Choose one of the delivery options:
- Send this email now
- Send this email later
- Save this email as a draft
Glossary
Contacts: Contacts don’t have the ability to login to the group, and can’t engage with the memberplanet community. They are only available to receive information sent to them by the group admin.
Smart List: a distribution list populated by automated, system-generated queries based on member actions and statuses. For example, Smart Lists can be created based on a group’s member levels, or those who’ve RSVP’d to an event.
Personalized text: an auto-populated element, such as name or email address, that is populated based on the individual recipient, and culled from the member database section of your group. This allows each email recipient to receive a personalized email.
Button: a one-click element for quick access to payment forms, donation sites, surveys, and the join-the-group process
Campaign name: the name of your email. For example, “April update” or “Spring Newsletter.”