Create a Survey
Surveys are a quick and easy way of gathering any type of information from your group, whether you’re soliciting feedback, gathering ideas, or collecting general data. Surveys are trackable and responses are automatically sorted into reports for viewing in platform or exporting to Excel. Here are a few examples in which sending a survey comes in handy:
- You’re planning an event and need to know who from your group can volunteer for different tasks, such as setup, guest check-in, decorations, clean up, etc.
- You’re hosting a team potluck and want to ask your group members who can bring what, as well as what food allergies they have (if any).
- You want to gather feedback after an event.
How do I create a survey from a template?
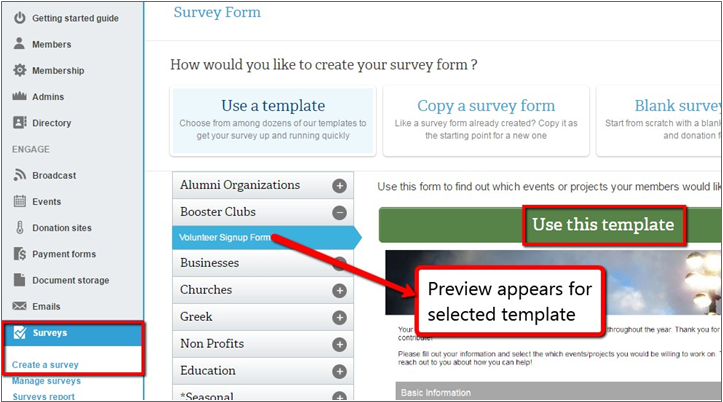
- On the left navigation sidebar, click on Surveys
- In the submenu, select Create a Survey
- Select a template from the available options. Click on the row of the + sign to expand the category. A preview will appear to the right of your selection
- Once you have found the template you want to use, click the Use This Template button
How do I create a survey from scratch?
If you want to completely customize your survey form instead of starting from a template, start from a blank survey form.
If you want to completely customize your survey form instead of starting from a template, start from a blank survey form.
- On the left navigation sidebar, click on Surveys
- In the submenu, select Create a Survey
- Click Blank Survey Form on the top right

Customize the look of a survey
These next steps allow admins to choose a specific color palette and upload a banner -- ideal identifiers for brand recognition and consistency.
These next steps allow admins to choose a specific color palette and upload a banner -- ideal identifiers for brand recognition and consistency.
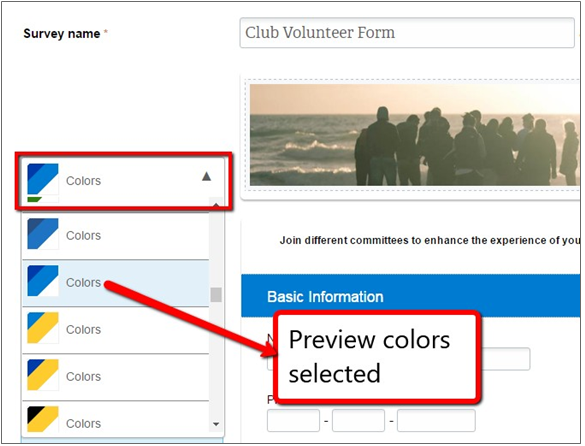
- Click the Colors dropdown menu
- Select a color palette from the available options. A preview of the colors selected will appear to the right
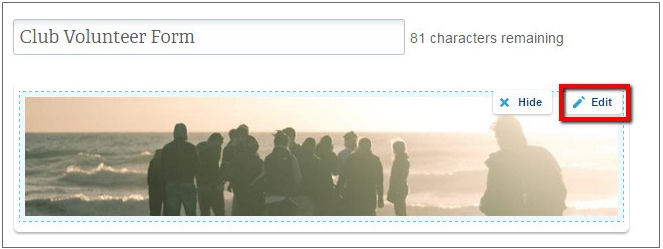
3. Hover over the banner image section. Click on the Edit button that appears
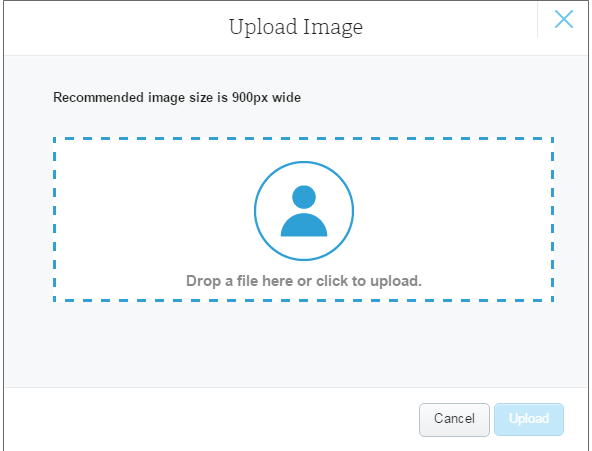
4. An overlay will appear. Drag and drop your desired photo into the allotted area, or click to browse and upload
Note: The recommended image size is 900 px wide.
5. Click the Upload button
Note: The recommended image size is 900 px wide.
5. Click the Upload button
Structure your survey and determine what info to collect
Admins have a variety of options available to customize the structure of a survey, use different input field types, and further define field options.
On the Add Fields tab, you have the option to drag and drop four different types of fields into their survey preview:
Basic: text or paragraph
Selection: dropdown, radio buttons, etc.
Preset: name, address, etc.
Section & Separators: divider or description
Note: On the survey form, you can select fields, including section headers, and drag and drop them to reposition them.
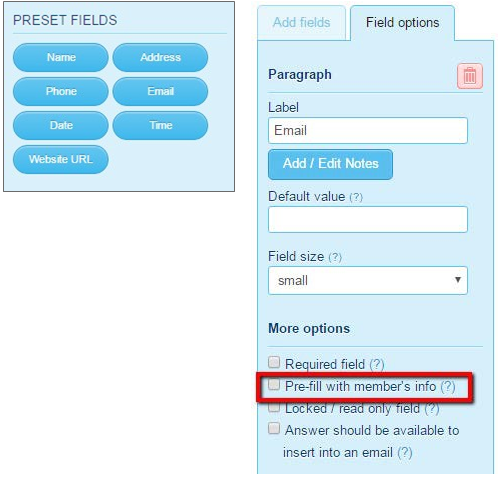
2. Use the Field Options tab to label, assign default values, and add notes to each field. Click on the field you want to edit and fill in the corresponding text boxes appearing on the left
Admins have a variety of options available to customize the structure of a survey, use different input field types, and further define field options.
On the Add Fields tab, you have the option to drag and drop four different types of fields into their survey preview:
Basic: text or paragraph
Selection: dropdown, radio buttons, etc.
Preset: name, address, etc.
Section & Separators: divider or description
- Add a new field by dragging it from the Add Field tab and dropping it onto your survey form. It will embed where you drop it.
Note: On the survey form, you can select fields, including section headers, and drag and drop them to reposition them.
2. Use the Field Options tab to label, assign default values, and add notes to each field. Click on the field you want to edit and fill in the corresponding text boxes appearing on the left

|
Pro Tip: One of the field options is to pre-fill fields with member information, which can save time for users. As long as they’re logged in, or coming to the form from a personalized link in an email campaign, their information will already be filled out for them and they can skip the field. Basic member data like name, email, contact info, address, and any custom membership questions your group has are available for pre- filling. Please note that certain types of fields can only be pre-filled with certain types of member info. For example, you must add a Name field to your form; you cannot pre-fill the member’s name into a Basic Text field.
|
3. Remove a field by selecting it on your form and clicking the trash icon located on the Field Options tab
4. Once your survey is complete, click Save & View More Options or Save & Publish Now. Both options will bring you to the survey admin page options. If you choose to publish, your form will be live, but you are welcome to continue editing on the admin page.
4. Once your survey is complete, click Save & View More Options or Save & Publish Now. Both options will bring you to the survey admin page options. If you choose to publish, your form will be live, but you are welcome to continue editing on the admin page.
Glossary
Survey: a form that gathers any type of information from your group
Survey: a form that gathers any type of information from your group